
DIY at home now concerns a large portion of French households, whether it involves small routine repairs or more ambitious renovation projects. Access to online tutorials and the diversification of tool offerings have made it easier to take action. However, successfully completing DIY tasks requires mastering some fundamentals that classic guides often overlook, particularly regarding the materials present in older buildings and the management of construction waste.
Old Materials and Diagnosis Before DIY Work
Before drilling a wall, sanding a floor covering, or removing a false ceiling, the nature of the materials in place determines the feasibility of the project. In a home built before 1997, the year asbestos was banned in France, certain elements (floor tiles, adhesives, ducts, fiber cement boards) may contain hazardous fibers.
A property diagnosis conducted during a sale or rental does not necessarily cover the materials that your work will directly affect. In case of doubt, suspending the intervention and consulting a professional remains the only reasonable approach. This reflex helps avoid exposing the occupants of the home to invisible toxic dust.
This type of verification also applies to electricity: replacing a switch or an outlet is not as complex as a complete renovation of the network. The guides available on bricoleurs.net help distinguish between DIY tasks and those that require a qualified professional. A new or fully renovated installation may also require a certificate of conformity (Consuel) before it can be put into service, whereas a simple replacement of equipment is not subject to this requirement.

Preparing Your Site: Tools and Workspace
Preparation accounts for half of the work. A poorly anticipated site generates trips to the store, approximate cuts, and disappointing finishes.
Building a Cohesive Toolbox
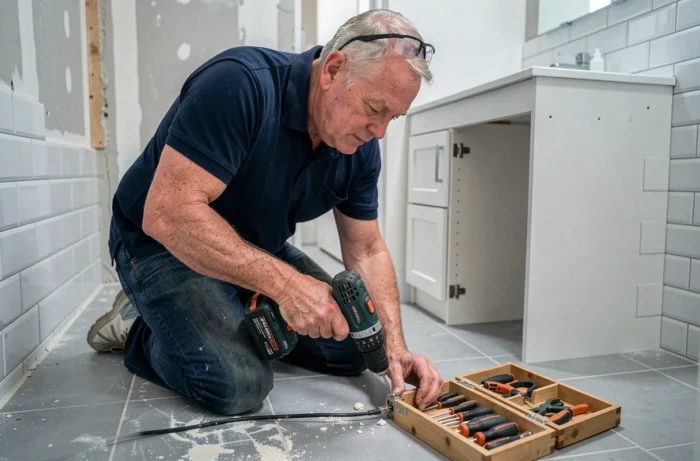
Rather than buying tools as needed, focus on a core set of versatile tools that cover most common projects:
- A tape measure, a spirit level, and a carpenter’s pencil, which are useful for every task, from assembling furniture to installing shelves
- A cordless drill-screwdriver with a suitable set of bits (wood, metal, concrete), which replaces several manual tools
- A set of flat and Phillips screwdrivers, a pair of pliers, and a carpenter’s hammer, sufficient for most household repairs
- A precision cutter and a hand saw (panel saw or back saw) for cutting lightweight materials
A medium-quality tool that is well-maintained lasts longer than a high-end tool that is neglected. Clean the blades after each use and store the tools in a dry place.
Organizing the Workspace
Protecting the floor and adjacent surfaces with a tarp or masking tape takes a few minutes but saves hours of cleaning. Clear enough space to move around the room or the piece of furniture being transformed. A stable work surface (folding table or simple trestle with a board) reduces cutting errors and limits fatigue.
Construction Waste: Anticipate Sorting from the Start
Waste management is an integral part of the project, not just the final cleanup. Debris, wood scraps, empty paint cans, leftover glue: each material falls under a different collection system.
The French extended producer responsibility scheme for construction products and materials (REP PMCB) organizes the collection and recovery of certain sorted waste. However, its planned overhaul in 2025 has been delayed, meaning that collection methods may vary from one municipality to another. Check local guidelines before loading your trunk: some recycling centers refuse mixed waste or impose maximum volumes per visit.
Planning separate bags or bins from the start of the project (one for wood, one for inert debris, one for packaging) greatly simplifies disposal and avoids refusals at collection points.
Painting and Finishes: The Most Visible Mistakes
Painting a wall or varnishing a countertop seems accessible. It is, provided you follow a specific order that makes all the difference in the final result.
Preparing the surface accounts for at least half of the total time of a painting project. Filling holes with putty, lightly sanding, dusting, and applying a suitable primer (plaster, wood, metal) ensures a durable bond. Skipping this step produces visible results as soon as it dries: blisters, marked roller lines, uneven color.
The choice of roller is as important as the choice of paint. A short-pile roller is suitable for smooth surfaces (doors, furniture). A medium-pile roller works better on a textured or slightly rough wall. Applying two thin coats rather than one thick coat results in a more uniform finish and dries faster.
Bathroom Seals: A Small Job with High Visual Impact
Replacing discolored or blackened silicone seals in a bathroom transforms the appearance of the room in less than an hour. Remove the old seal with a cutter, clean the surface with household alcohol, then apply a regular bead of sanitary silicone. Smooth with a wet finger using soapy water in a continuous motion, without going back. The result depends almost entirely on the consistency of the motion.
Every DIY project at home, even modest ones, benefits from being treated like a real job: diagnosing materials, preparing the surface, using appropriate tools, and planning waste sorting. Failed finishes almost always stem from insufficient preparation, rarely from a lack of technical skill. Taking an extra hour before starting often prevents the need to start over.